Wedding Invitation Card: 5 Steps to a Clear Video Invite
I’ll show you how to make a wedding video invite guests can act on, starting with the details worth checking before you choose a design.
Iris TennantReviewer · published Oct 26, 2026 · 6 min read
01The address matters more than the animation
On Tuesday evening, I was sorting the family calendar when a wedding invitation arrived in a group chat. It looked lovely, but I had to pause the video to find the venue. That is the problem I would solve first in Wedding Invitation Card Maker: make an invite guests can enjoy without making them hunt for the details they need.
Before opening a template, write one short block of information to copy from: the couple’s names, the ceremony date and time, the venue name and full address, and a contact for questions. If there are separate events, give each its own time and place. Keep this beside you as you design; it is much easier than trying to recall an address while editing text.
Decide who will receive this particular invite, too. A ceremony invitation and a reception-only invitation need different wording. I would finish one audience’s version before adapting it for another, rather than trying to squeeze every event onto the same screen. Once the words are settled, the template becomes a useful starting point instead of a distraction.
02Choose a template that leaves room for the venue
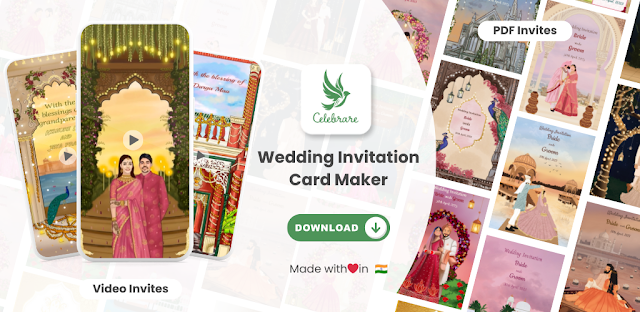
Open the Google Play listing for Wedding Invitation Card Maker by Celebrare Invitations, tap “Install,” then tap “Open.” The app offers customizable e-cards and video invitations for weddings and Shaadi celebrations. Start with the format you actually plan to share: a card if guests need to glance at details quickly, or a video if the announcement itself is part of the occasion.
I would scan designs for a clear place to put the date and address before getting attached to the artwork. A richly decorated template can suit a celebration beautifully, but narrow text areas are awkward when a venue has a long street name. Pick a layout where the practical details can sit together, then open it to begin customizing.
If you are choosing between several designs, picture the invite arriving between messages about restaurant reservations and event tickets. Would the date stand out at a glance? That quick check is more useful than choosing solely by colour. Next, put the essential words in place before adjusting music or decorative elements.
03Add the words in the order guests will need them
I would enter the names and event details first, using the template’s editable text areas and the app’s drag-and-drop design tools. Keep the venue name with its address, and put the event time beside the date. If the design separates these across several scenes, make sure a guest never has to guess which time belongs to which place.
Tap the invitation template you want to edit.
Tap an editable text area and replace the placeholder names.
Tap the date and time text area; enter the event date and start time.
Tap the venue text area; enter the venue name and full address.
Use the drag-and-drop controls to move text where it stays readable.
Read every line as if you were a guest who knows nothing about the plans. A phrase such as “join us for dinner” is welcoming, but it cannot stand in for a start time. If you have a separate ceremony and reception, label both clearly. Save decorative wording for the space that remains after those facts are easy to find.
04Make the video pleasant without burying the details
A video invitation can use music, animation and a personal message. I would keep the personal message short enough that the practical information still has room to breathe. Guests may watch with sound off while arranging takeout or travelling home, so names, date, time and venue should appear as text rather than relying on a spoken message.
Use the design tools to adjust the placement of text, fonts or overlays only where they improve reading. Watch for lettering that blends into a gradient or sits over a busy part of the design. If the template moves between scenes, give the venue its own uncluttered moment instead of stacking it under a long greeting.
Music should support the invitation, not become the reason someone misses an address. I would choose a design whose message still makes sense when muted, then check the full video from its opening frame to its last. The next pass is not about taste; it is about catching the small mistakes that send guests back to the chat with questions.
05Preview it like the guest who will be late
Before sharing, I would look at the finished invitation on my phone at an ordinary viewing size, without zooming in. Can I read the address in one pass? Does the date remain visible long enough to take in? A beautiful frame is no help if a guest has to stop the video repeatedly to work out where to go.
Tap “Preview” to watch the invitation from beginning to end.
Pause on the date and venue; check every name, digit and address line.
Tap “Edit” if a line is crowded or a detail is wrong.
Tap “Preview” again and watch once with the sound off.
Check spellings against your original information block, not your memory. Pay particular attention to similar-looking venue names and to the time on each event screen. If you are making both a card and a video, compare them side by side before either goes out. Matching details matter more than matching colours.
06Share one clear version, then keep the details handy
When the preview reads cleanly, use the app’s sharing control to send the invitation through the channel your guests already use. I would send the finished version to one person involved in planning first and ask a narrow question: “What time and address do you see?” That invites a useful check without turning the design into a committee project.
Tap “Share” on the finished invitation.
Choose the messaging app or sharing option you use for guests.
Check the recipient or group before you send.
Send the invitation, then keep your event details block available for replies.
If a guest asks about food delivery to the venue, parking or an arrival time for a separate event, answer that question directly rather than assuming the invitation covers every plan. For later changes, return to your saved details and revise the invitation carefully before sending a corrected version. The goal is a message people can trust, not one that tries to carry the whole wedding plan.
The takeaway
Write the names, event time and full venue address first. Then choose a template with enough space to show them clearly, and preview the result with the sound off.
Continue to this site’s Wedding Invitation Card page just below for more practical help.
Small Practical Wins is independent and not affiliated with Celebrare Invitations. This guide reflects the reviewer's own setup; menus can differ by device and version.

 Best picksHubspace

 TipsAmazon Fire TV
 TipsAthan

 TroubleshootingGOWOD

 TipsNFHS Network

 How-toUNIQLO

 TipsFood City
 TroubleshootingNotes

 TipsGmail

 CompareMarineTraffic
 Best picksW.W. Grainger